
Why leave a PZEM that works?
A PZEM-004T is a fine little meter. It keeps its own kilowatt-hour total in EEPROM, so your energy survives a reboot, and for one circuit it does the job. You outgrow it for two reasons:
- It owns a UART. The PZEM talks over a serial link — a hardware UART you'd rather use for something else,
or
SoftwareSerial, whose timing gets flaky under WiFi load. One meter, one serial port. - It doesn't scale. Want a second circuit? That's a second UART (you have one or two) or a second ESP. There's no clean "add another" — which is exactly the wall people hit when they try to meter more than one or two circuits.
rbAmp talks I²C — a bus — so you free the UART, gain factory-calibrated, phase-compensated measurement, and can add more modules on the same two wires later (that's the whole-panel project). The one thing that stops people upgrading is the fear of losing their Home Assistant history — years of graphs, the Energy Dashboard, all of it. You don't have to. Done right, HA never notices the hardware changed.
What you keep, what you gain
Keep: your entity IDs, every history graph, your dashboards, and your Energy Dashboard configuration — untouched. Gain: - A freed UART — the GPIOs the PZEM used are yours again. - Room to grow — add modules on the I²C bus without another ESP (whole panel on one ESP32). - Factory-calibrated, phase-compensated real power — measured, not estimated (see how measurement really works). - On-device watt-hours — accumulated on the module and handed to HA as a total, so you're not relying on HA integrating power between samples (the source of the classic Energy-Dashboard spikes).
Bill of materials
| Item | Why | Where |
|---|---|---|
| rbAmp Basic Wattmeter (UI1) | replaces the PZEM head, on I²C | Basic Wattmeter module |
| A new SCT-013 CT (rating to match the circuit) | the clamp | SCT-013 CT |
| your existing ESP32 | reused — you're freeing its UART | — |
| 4 jumper wires | the I²C bus | — |
Don't reuse the PZEM's clamp. A PZEM-004T's CT is typically 100 A rated (outside rbAmp's calibration presets), uses a 2.5 mm mono jack (rbAmp expects a 3.5 mm), and its output type isn't guaranteed to match. A fresh SCT-013 is a few dollars and removes all three snags — and since you're already swapping the module head, it keeps the job a clean "swap, don't adapt."
⚠️ Before you open the panel. Re-clamping a CT means working near live conductors. A CT clamps around an insulated wire — you never cut or strip it — but if you're not comfortable inside a live panel, kill the main and verify dead first, or have a qualified electrician place the CT and bring the low-voltage leads out.
The swap: one YAML edit
The trick to keeping your history is simple: Home Assistant identifies entities by their entity_id, and
ESPHome derives that from the node name + the sensor name:. Keep both identical to your old PZEM config and
HA sees the same entities — just fed by better hardware. Here's the "after" config (your PZEM UART block is
gone; I²C takes its place):
esphome:
  name: energy-monitor          # ← MUST match your PZEM node name, byte-for-byte
esp32:
  board: esp32dev
  framework:
    type: arduino
wifi:
  ssid: !secret wifi_ssid
  password: !secret wifi_password
api:
ota:
  - platform: esphome
logger:
# The rbAmp side of the swap — I²C replaces the old UART pins.
i2c:
  sda: GPIO21
  scl: GPIO22
  frequency: 50kHz   # ESP-IDF i2c_master driver + the module's I²C recovery window interact at
                     # 100 kHz → intermittent read NACKs on ESP32. 50 kHz is the robust setting.
                     # STM32 / RP2040 / Linux-SBC masters run this module at 100 kHz fine.
  scan: true
external_components:
  - source: github://rb-amp/[email protected]
    components: [rbamp]
rbamp:
  id: meter
  address: 0x50
  update_interval: 60s
  ct_model: SCT_013_030         # match to YOUR fitted CT
sensor:
  - platform: rbamp
    rbamp_id: meter
    # ⚠ Each name: MUST match your old PZEM sensor names byte-for-byte → same entity_id → history preserved.
    voltage: { name: "PZEM Voltage" }
    current: { name: "PZEM Current" }
    power:   { name: "PZEM Power" }
    energy:  { name: "PZEM Energy" }   # ← the Energy Dashboard entity — preserved
(Keeping the literal names "PZEM Voltage" etc. only matters if that's what your old config used — match
whatever yours were. The point is byte-for-byte sameness.)
Preserve your history — the exact steps
- Note your current entity IDs. Settings → Devices & Services → your PZEM node → write down the sensor
entity_ids (e.g.sensor.pzem_voltage,sensor.pzem_energy) and confirm which one feeds the Energy Dashboard (Settings → Energy). - Install the rbAmp next to the PZEM; clamp the new SCT-013 around the same conductor; wire the I²C bus to the ESP32. (You can leave the PZEM physically connected — the switch is in software.)
- Overwrite your old YAML with the config above, editing only: the
esphome: name:to your old node name, each sensorname:to your old sensor names byte-for-byte, andct_model:to your CT. - Flash it —
esphome run energy-monitor.yaml. HA sees the same node/API come back with data; no "new device found" banner, no re-adoption. - Verify within 60 s — the entities should be the same IDs (not
..._2). If you see a_2suffix, a name doesn't match byte-for-byte; fix and re-flash.
Once the swap has stuck, those PZEM … labels are only there to match the old entity_id. You can rename the
friendly names in the Home Assistant UI whenever you like (open the entity → rename) — the entity_id and
its history stay exactly as they are.
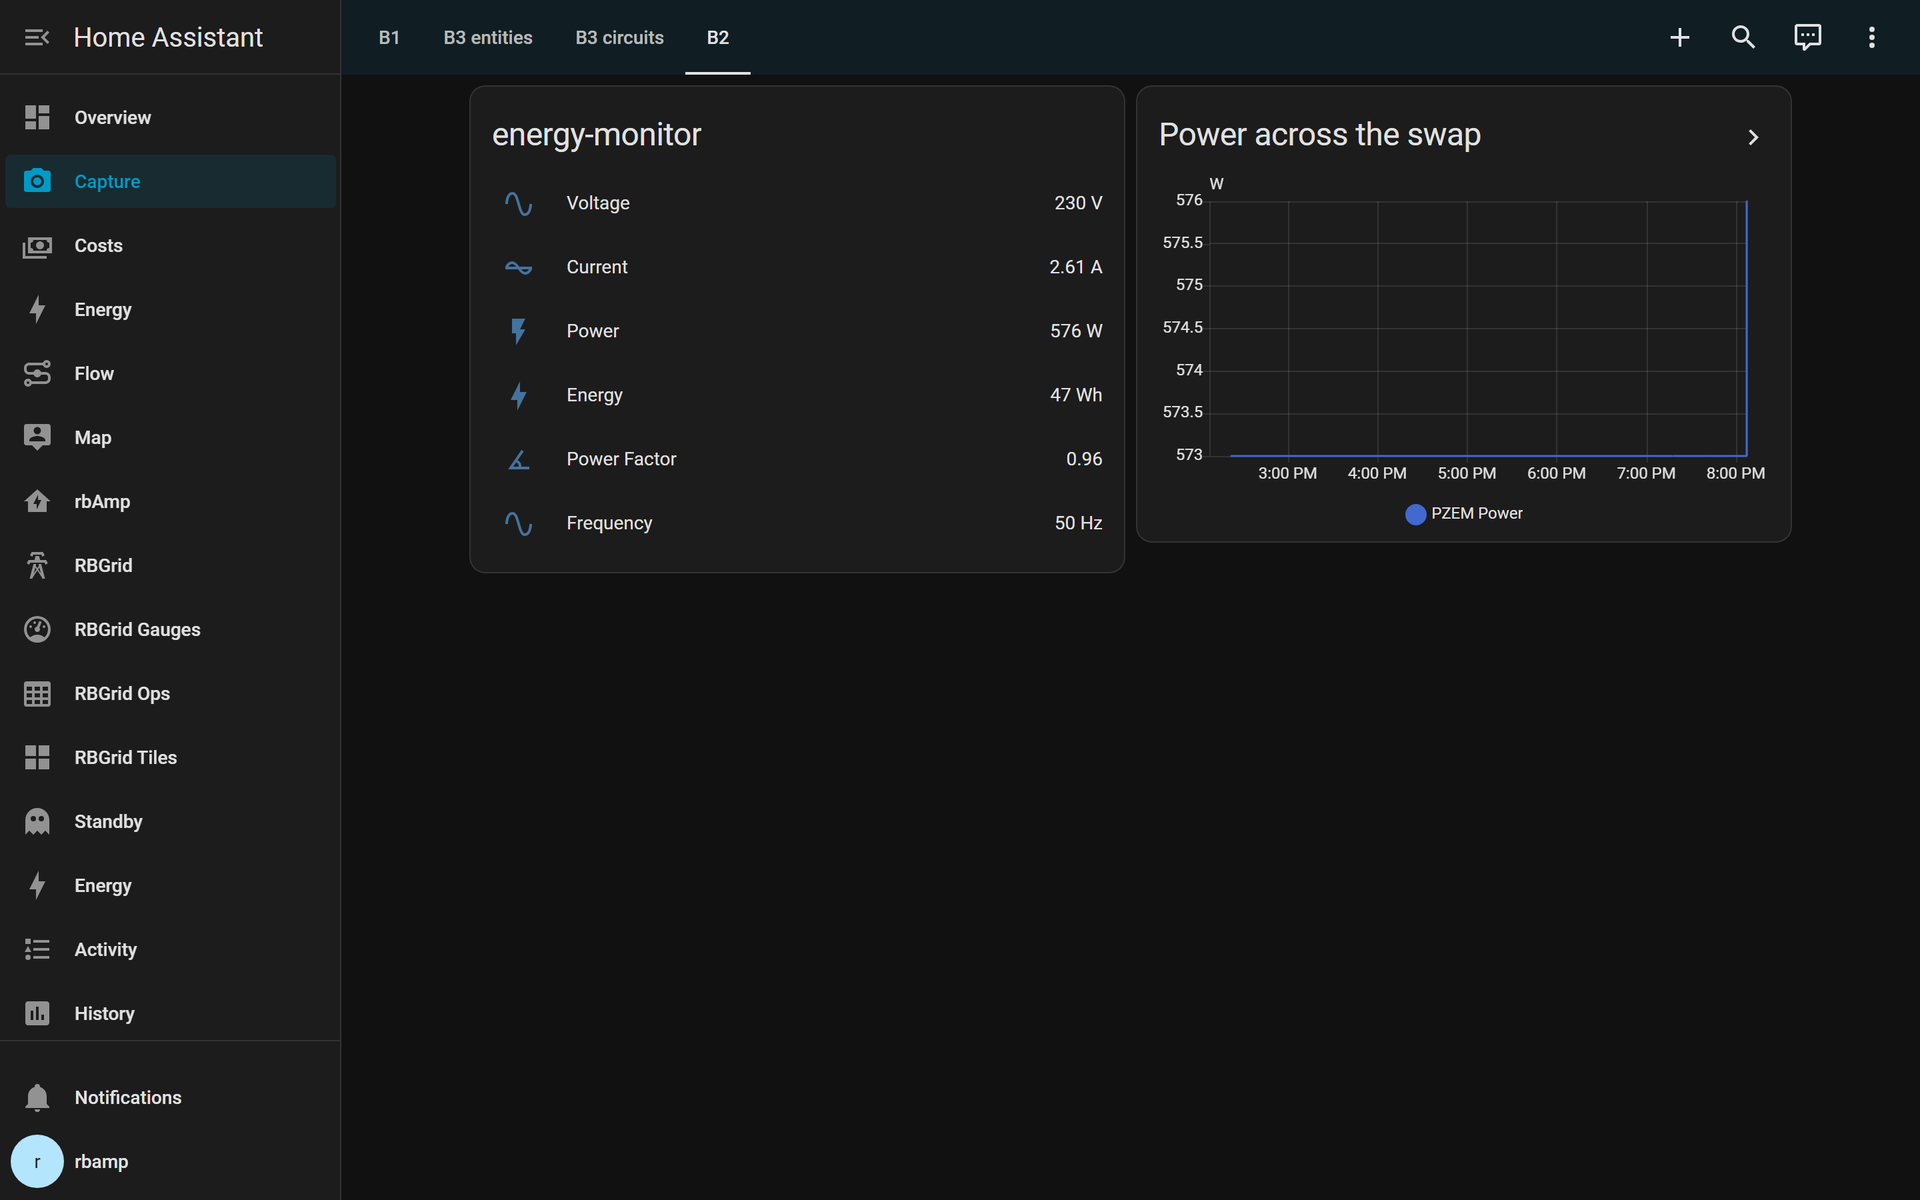
One honest caveat. After the swap, your history graphs and the Energy Dashboard stay intact — the long-term statistics carry across and the new readings append to the same series. But the current-value Wh card will read
0and count up from there: that's the fresh rbAmp counter starting, not lost data. HA'stotal_increasinghandling stitches it onto your existing cumulative behind the scenes. Expect the live card to restart; your history does not.
What you'll see in Home Assistant:
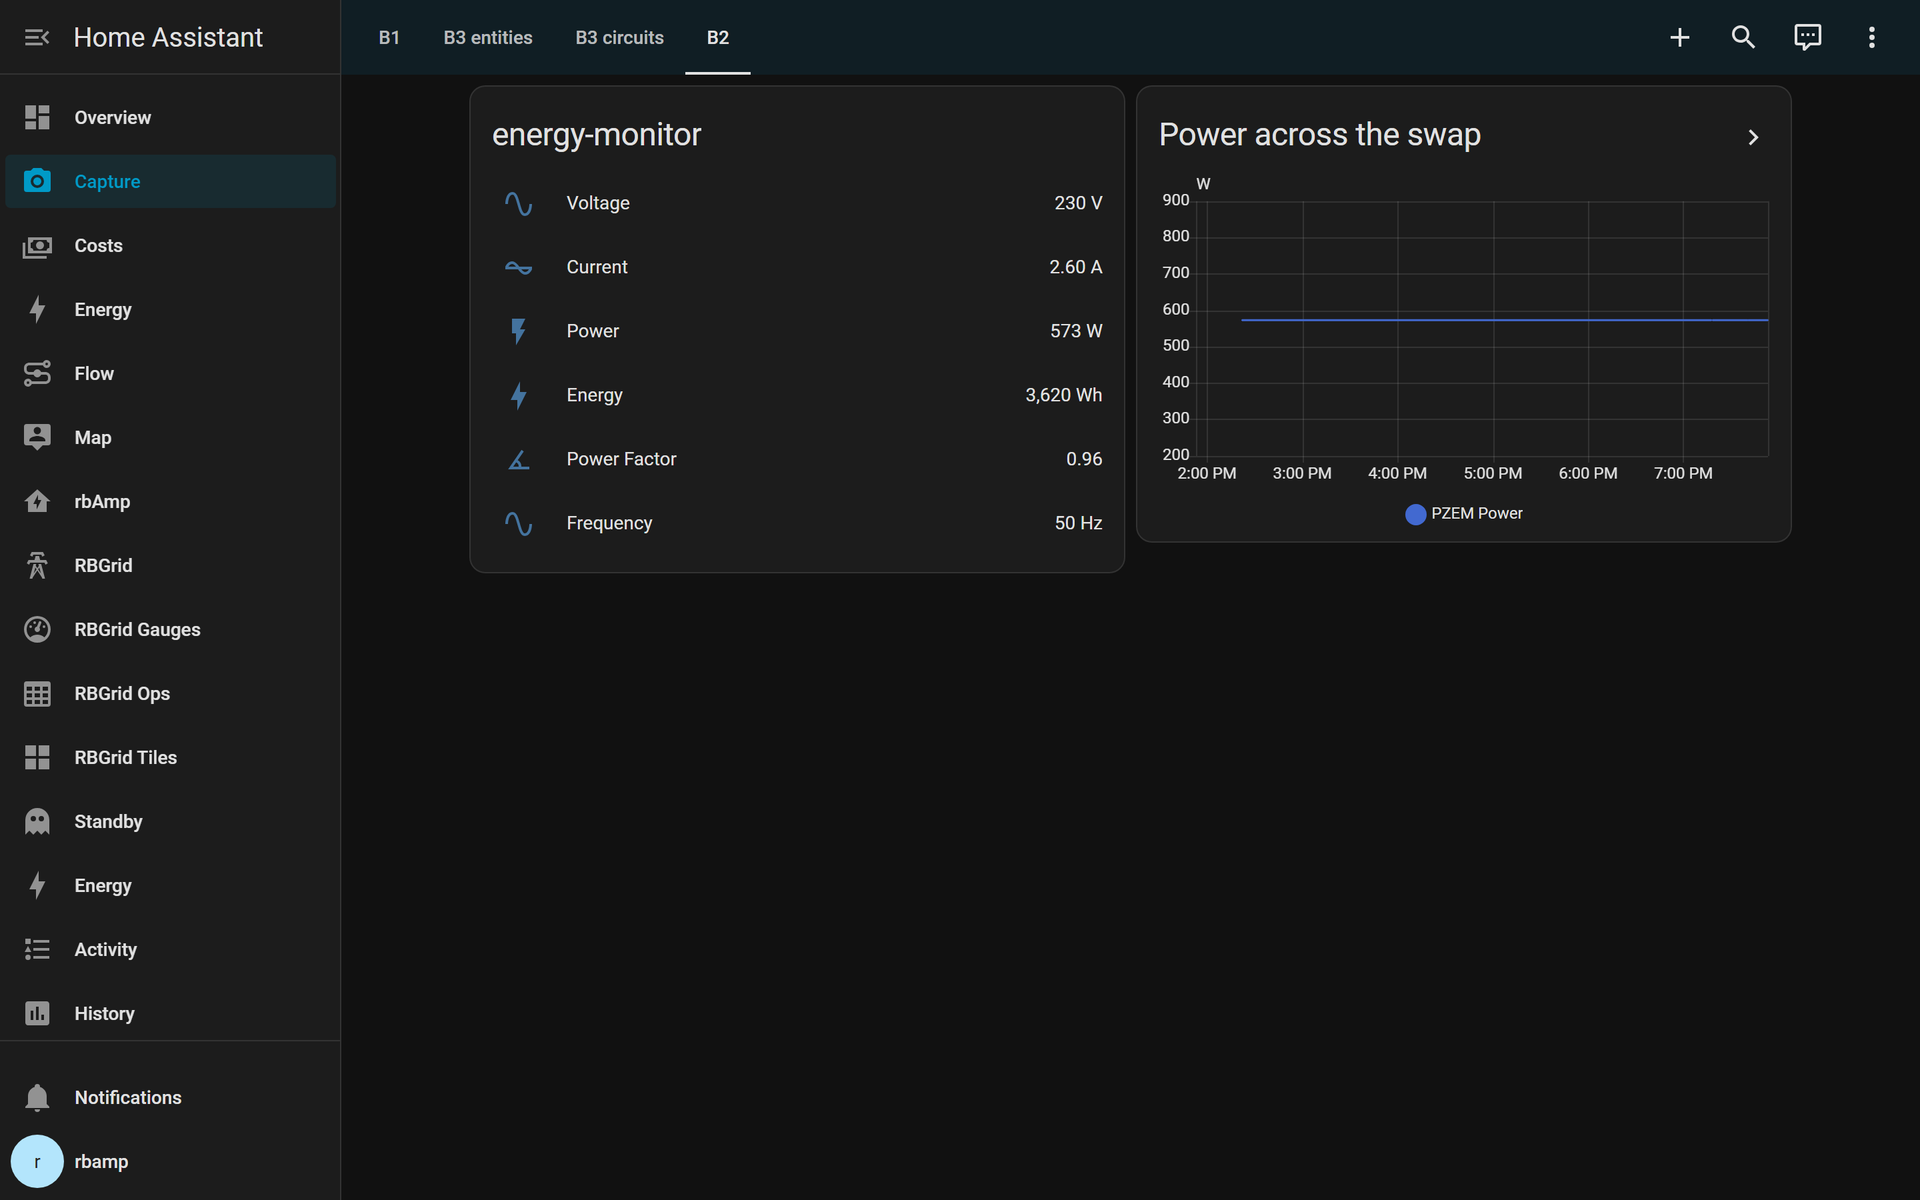
Before the swap — your PZEM entities, exactly as they are today:
After the flash — the same entity IDs, now fed by rbAmp (the energy card reads a fresh count, per the caveat above):
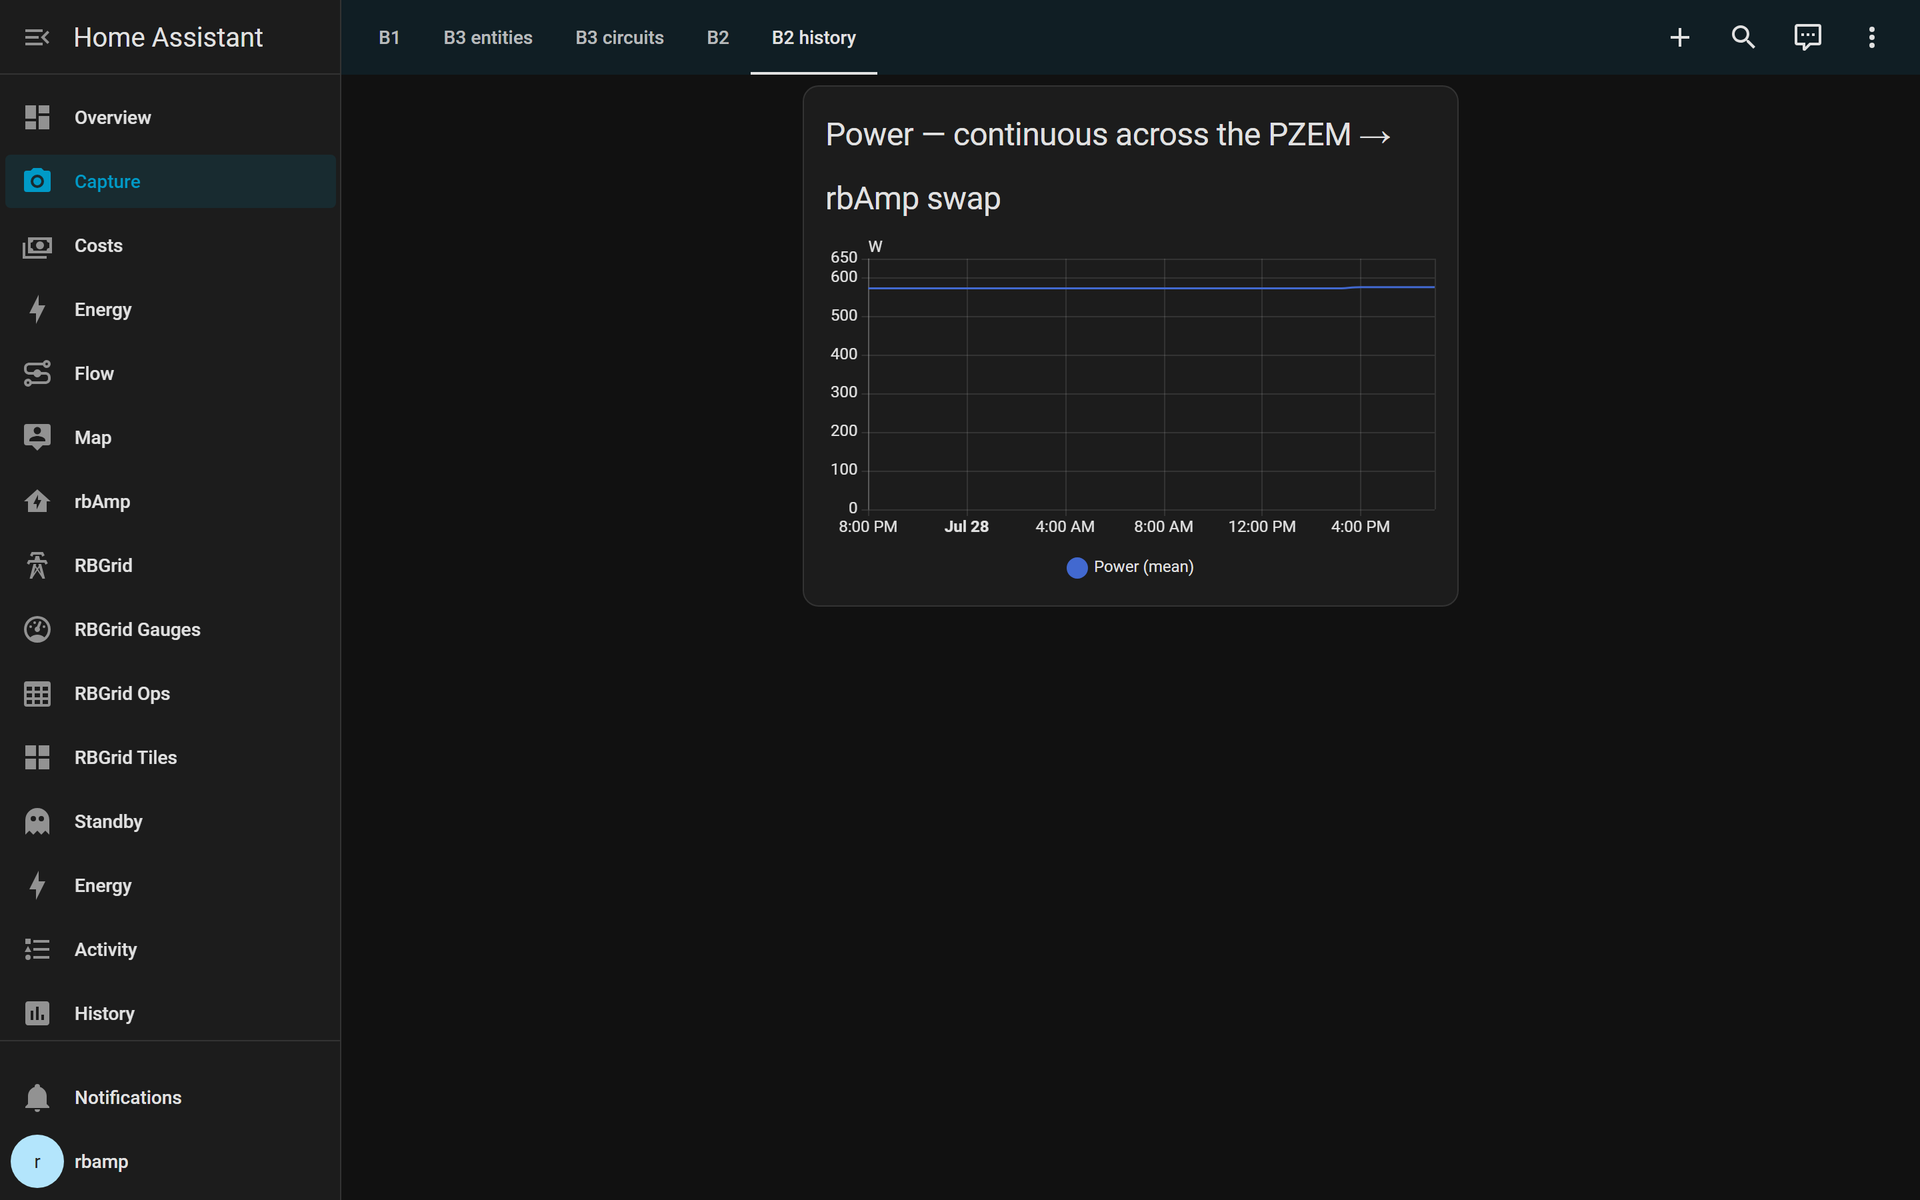
And the whole point — power reads straight through the swap with no gap and no drop to zero. Your history is intact:
Trust it first: measure both side by side (optional)
Not ready to commit blind? Run both meters on the same ESP32 for a day and watch them agree, then delete the PZEM block. This config keeps the PZEM on its UART and adds rbAmp on I²C, with distinct names so HA graphs both:
# PZEM (reference) on the existing UART
uart:
  rx_pin: GPIO16
  tx_pin: GPIO17
  baud_rate: 9600
sensor:
  - platform: pzemac
    voltage: { name: "PZEM Ref Voltage" }
    current: { name: "PZEM Ref Current" }
    power:   { name: "PZEM Ref Power" }
    energy:  { name: "PZEM Ref Energy" }
# rbAmp (new) on I²C
i2c:
  sda: GPIO21
  scl: GPIO22
  frequency: 50kHz   # 50 kHz on ESP32 — see the note in the single-meter config above (ESP-IDF i2c_master driver).
external_components:
  - source: github://rb-amp/[email protected]
    components: [rbamp]
rbamp:
  id: meter
  address: 0x50
  ct_model: SCT_013_030
sensor:
  - platform: rbamp
    rbamp_id: meter
    voltage: { name: "rbAmp New Voltage" }
    current: { name: "rbAmp New Current" }
    power:   { name: "rbAmp New Power" }
    energy:  { name: "rbAmp New Energy" }
Overlay the two power series in a history card; on the same conductor they track within a percent or two. Happy? Flash the single-meter config from above (matching your old names) and you're migrated — history and all.
What you gained
- A UART back — reuse GPIO16/17 for another peripheral, or a second I²C bus for more rbAmp modules.
- A bus to grow on — the whole panel on one ESP32 is now a few modules away.
- Measurement you can trust — factory-calibrated, phase-compensated real power; see how CT measurement really works.
Rollback
If anything looks off, flash your original PZEM YAML back to the same ESP32 — the same entity IDs resume and the PZEM's EEPROM counter picks up where it left off. Nothing is burned.
Comparing your options? See rbAmp vs PZEM-004T — the head-to-head for ESP32 & Home Assistant — and rbAmp vs Shelly EM.
What's next
- Next in this track: The whole panel on one ESP32 — add the rest of your circuits, one small module at a time.
- Coming from a PZEM? rbAmp vs PZEM-004T — the head-to-head, so you know exactly what changed.
- The theory: How CT energy measurement really works — how a CT turns a magnetic field into kilowatt-hours.
[newsletter / early-adopter subscribe block — deploy session inserts the site's standard subscribe snippet]